The Pizza Bible – A Review

I admit, I got The Pizza Bible by Tony Gemignani from Blogging For Books ages ago. I like cooking and we both love pizza, so it seemed perfect. Unfortunately, it arrived at an awkward time for us and got shelved for far too long. Recently, I was going through books that never made it on to our somewhat limited book shelf real estate and decided to take the plunge.

First of all, this book is not for casual pizza fans who want a new way to top a pizza. It really is a masterclass in the art of pizza making. The downside to that is that the recipes can call for some specialized ingredients that may not be available locally for many people. We absolutely could not find diastatic malt powder anywhere locally, even in Asheville. They also call for specialized equipment specifically for pizza making. For instance, Gemignani recommends using two pizzas stones in the same oven with one on the top rack and the other on the bottom to ensure the best cook for your crust. For those of us with limited kitchen space who don’t make pizza more than once a month at best, this can seem like a bit much.

The upside is that most of the specialized ingredients and equipment can be skipped if you don’t have them on hand and the recipes will still turn out great (though perhaps not quite as great as they would have with, for instance, two pizza stones and diastatic malt powder).

IMG_5207.jpg

Our first attempt was a classic Sicillian-style pizza with the classic Sicillian sauce from the book and our own goat mozzarella. The dough was definitely not something you want to try right off the bat if you aren’t already familiar with bread making. It also wasn’t a quick weeknight sort of dish. In fact, I started it on Monday and we didn’t make the pizza until Wednesday since the dough had to, not only rise, but also chill in the fridge for 24-48 hours.

The outcome was quite good, despite not having all of the materials called for by the book. I do think that the quality of the crust would have benefited a lot from the additions, but we still got a delicious pizza!

The recipes are clear and easy to follow. The beginning of the book also starts with a masterclass section that teaches you essential techniques. Even if you are completely irresponsible and just skip to the particular pizza you would like to make (*ahem*), the recipes refer back to those techniques along the way with page references, so it’s easy to look back to get a better idea of what you need to be doing.

Overall, I would definitely recommend this for anyone who is serious about pizza!
Sugar Rush: A Must for Bakers!

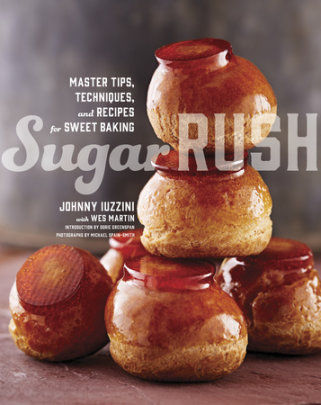
Sugar Rush Baking Cookbook Review

I love baking, and I tend to do a lot of it around the holidays. This year, I picked up a cookbook called Sugar Rush before the baking madness began, courtesy of Blogging for Books. Unfortunately, I got sick during prime baking time, so I didn’t get to make nearly as many goodies as I intended to. However, Sugar Rush is a gem of a book for bakers or anyone who wants to learn more about the art of baking, and I know I’ll put it to good use next year. The book covers the basics of baking (spoon flour into your measuring cup and level it off to measure) to more advanced types of baking (inverted puff pastry, anyone?). The recipes also run from simple cookies to complex pastries. Whether you’re looking for a recipe for Killer Chocolate Chip Cookies or Earl Grey Creme Caramel, you’ll find it in this book. The best thing about Sugar Rush is that, unlike many cook books, it doesn’t just tell you how to do something, it shows you with tons of great photos throughout the book. I highly recommend this book to anyone who wants to take their baking to the next level or just learn some great new recipes.

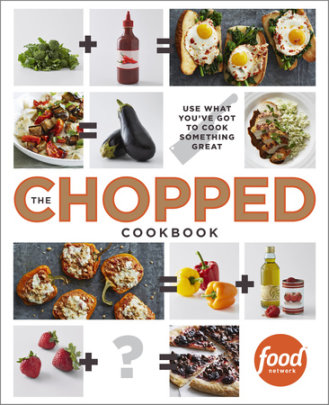
The Chopped Cookbook Review

Chopped Cookbook Review

I’m a big fan of just about everything on Food Network, and, when we had cable, Chopped was a regular watch for us. If you aren’t familiar with the show, chefs are given baskets with specific (often weird) ingredients that the have to combine with items from the show’s pantry to create memorable dishes 30 minutes. It’s a fun show, and the chefs end up making some very creative – and occasionally downright bizarre – dishes. So, when Blogging for Books sent me a copy of the Chopped Cookbook to review, I was super excited.

The book aims to take out the sometimes strange ingredients given to chefs on the show and replace them with “ingredients that most Americans buy every week at the supermarket.” Great! A cookbook with fun, quick recipes that uses ingredients on hand – what could be better!

When the book arrived, I was thrilled to flip through the recipes. What struck me most, though, was the question, “What does this have to do with Chopped?” Even with the premise of using ingredients most people have, most of the recipes would require a trip to the store for us. I started at the beginning and read the tips about flavor combinations and substitutions, but I didn’t find it all that informative. The best tips are peppered throughout the book, and the recipe tables for simple pan sauces and dressings were one of the highlights.

We marked a number of recipes that we wanted to try out, but we’ve only tried two of them so far. I have to say, despite their promise, both recipes were misses for us. The first we tried was Shepherd’s Stew with Dumplings. We both love shepherd’s pie, so we were looking forward to trying a different take on it. The end result was closer to beef stroganoff than shepherd’s pin in the flavor profile and used entirely too much butter. I have no problem modifying recipes to suit our tastes, but that one was just a bit too far off to bother with again as it wasn’t particularly easy or quick, and it required a number of ingredients we just don’t keep on hand like gnocchi, ground beef, fresh herbs, and chicken broth. Maybe we’re bad people for not keeping a fully stocked pantry at all times, but anything that will go bad usually isn’t in our fridge and if we buy something like gnocchi, we usually know exactly what we’re doing with it.

The second recipe we tried was Turkish Chicken Tacos. We love tacos, so we were definitely drawn to some of the taco variations in The Chopped Cookbook. We decided to use pitas instead of flour tortillas, but otherwise we followed the recipe. The recipe was seasoned ground chicken topped with a marinated onion salad and a yogurt sauce. The meat needed more seasoning, but the flavors of the meat didn’t go with the onion and parsley salad particularly well. It wasn’t a bad dish, but it was rather unmemorable. Once again, while it wasn’t a difficult dish to make, it certainly wasn’t quick or simple enough to make me want to go back and tweak the seasoning. There are just too many other recipes out there to try for me to spend time and money trying to make a mediocre recipe good.

I’m not saying that The Chopped Cookbook is a bad cookbook, but it just doesn’t do it for me. The tips and simple recipes, like frittatas and dressings, are good. However, I felt that the more complex recipes fell short, and required more time and outside ingredients than I wanted. There are certainly some other recipes in the book that we might try in the future, but I think I’ll try out a few of my Pinterest saves before I go back to it.


Slow Cooker Shredded Beef Tacos

I interrupt this study schedule to bring you this breaking news – I have discovered an incredibly easy, yet amazingly simple recipe for shredded beef tacos.

Slow Cooker Shredded Beef Tacos

Actually, credit for this bit of genius belongs to my brilliant husband who refuses to let me publish the adorable picture I took of him looking pissed that I was taking a picture of him while making these.

[Photo of John looking pissed, yet adorable holding plate of taco meat]

We’ve been looking for ways to make healthier food with less red meat, so I was combing Pinterest for ideas. I came across this recipe for slow cooker chicken tacos that piqued my interest. We actually made them for enchiladas over the weekend, and I’ll probably post that recipe too at some point. But then, my absolutely amazing husband said, “We both love beef. Why don’t we try it with beef instead?” And this deliciousness was born.

Slow Cooker Shredded Beef Tacos

Shredded Beef Tacos

  • 2-2 1/2 lbs chuck roast (other relatively fatty cuts of pot roast beef can be used as well)
  • 16 oz. salsa
  • 1 package of taco seasoning
  • 1 package flour or corn tortilla shells
  • Preferred taco condiments
  1. First of all, mix together the salsa and taco seasoning in your slow cooker. If you prefer spicier food, go for the spicy options, but which ones you choose are really up to personal preference.taco 7
  2. Cut your chuck roast into slightly smaller chunks. While this step isn’t completely necessary, we feel that it helps get maximum flavor from the sauce. Keep in mind that the more beef you use, the less saucy the end result will be.Slow Cooker Shredded Beef Tacos
  3. Add the beef to the sauce and make sure it’s covered. Cook on high for 4-6 hours or low for 6-8 hours.
  4. Once the beef is falling apart, take each piece out of the slow cooker for shredding. Take two forks and use them to pull the beef apart. taco 3
  5. Put the shredded beef back into the slow cooker and cook on low for another 30 minutes to an hour. Slow Cooker Shredded Beef Tacos
  6. Your beef should have the consistency of really good barbeque. We used 2 lbs of meat for this culinary experiment – if you prefer less saucy tacos, use a bit more beef.
  7. Put the beef on your tortilla shells, slap on your favorite condiments, and dig in!

This meal was absolutely delicious, super easy, and quite economical. We got two nights of dinner and one lunch for two people out of it, despite the fact that we both kinda hurt ourselves the first night since it was so tasty. After that, all we had left was this:


  1. taco plate

Steak Pesto Pasta

Wow, it’s hard to believe it’s been almost a month since my last post. The semester is coming to a close, and I’m still searching for a job after graduation. Thankfully, John got a job at Lowe’s. Granted, it’s a part-time seasonal position, but we’re hoping it will lead to something more permanent.

I decided today would be a good day to share one of our culinary adventures with you. It’s a recipe for Steak Pesto Pasta. It’s a quick and simple recipe that tastes great.

Steak Pesto Pasta


Ingredients

  • 1/2 lb lean steak
  • 8 oz white mushrooms, sliced
  • 2 cloves garlic, minced
  • 8 oz penne pasta
  • 1/4 cup pesto sauce – store bought or from this recipe
  • 1 tbsp olive oil

First of all, you’ll want to slice your steak into nice thin strips. You can often get steak for stir frying from your grocery store that requires very little extra cutting.

https://www.etsy.com/listing/126360223/earring-wires-300-earring-hooks-fish?ref=shop_home_active

Begin cooking your pasta according to package directions.

Heat your pan to medium high heat. Add olive oil, mushrooms, and garlic. Saute until the mushrooms are tender and a light brown color. You can increase the amount of garlic or omit it altogether depending on how garlicky you like your pasta and what kind of sauce you’re using – remember the pesto already has garlic in it.

Remove the garlic and mushrooms and set aside.

Place pan back on heat and add steak. Cook until they are cooked through, but beware of overcooking. The strips are thin and don’t take very long.

Turn off the burner. Add the garlic and mushrooms back to the pan to allow them to reheat with the residual heat.

Drain pasta and place back in pot.

Add the contents of the pan to the pasta. Add pesto sauce and toss.

Steak Pesto Pasta

It’s that easy! Top with a bit of Parmesan and some cracked black pepper and enjoy!


Ginger Almond Biscotti Recipe

After exams, a flu, and lots of last minute Christmas orders, I’m finally back! I’m very much hoping to get back to a fairly regular blogging schedule, and I really do plan on posting the rest of the honeymoon saga (though I’m sure you’ve all long since lost interest). In the meantime though, I’m going to give you fun holiday recipe.

Ginger Almond Biscotti - Haus of Ariella

I don’t cook often (thankfully my husband is an excellent cook and doesn’t mind doing it), but I do like to bake from time to time. Biscotti happens to be something I’m pretty good at, so I usually make a batch or two around this time of year. It’s great for giving as a gift – it’s not hard to make, it’s a bit different, and it keeps well in tins.

I have a particular recipe that I usually like to use, but this year I couldn’t find it. It turns out it’s at my mom’s house, but not having it handy inspired me to try something new. This recipe is an adaptation of this Epicurious recipe.

Note that these are very gingery, even as I have the recipe written (Epicurious called for even more ginger). If you aren’t a huge ginger fan, you can cut down the ginger by using a little less ground ginger or substituting the crystallized ginger for another ingredient like dried fruits. I think that this would be great with chopped dates.

If you’re wondering what crystallized ginger is, it’s basically just candied ginger. I think it’s delicious on its own, plus it’s great if you have a stomachache. You can usually find it as health food stores and food co-ops. I got mine from a bin at Whole Foods.

Also, this recipe makes about 14-16 5″ biscotti (depending on how you cut them/shape the loaves), which is enough for one very full, round Christmas tin. If you’re doing a few tins for people, you might want to double the recipe.

Ginger Almond Biscotti

Ginger Almond Biscotti - Haus of Ariella

Ingredients

  • 3/4 cup dry toasted, unsalted almonds (you can also toasted raw almonds in an oven for about 10 minutes)
  • 1/2 cup crystallized ginger
  • 1 cup all-purpose flour
  • 1/2 cup sugar
  • 1 teaspoon ground ginger
  • 1/2 teaspoon salt
  • 1/4 teaspoon baking soda
  • 1 large egg
  • 1 large egg white
  • 1/2 teaspoon vanilla

First of all, preheat your oven to 300°F.

Next, coarsely chop your crystallized ginger and almonds. You can chop them together, since they’ll go into the recipe at the same time. Note that the ginger is sticky inside.

Ginger Almond Biscotti - Haus of Ariella

Next you’ll need to sift together the flour, sugar, ground ginger, salt, and baking soda. If you don’t have a sifter (like me) a neat trick is to take a metal strainer and use it to sift the ingredients.

Using a strainer as a sifter

In a separate bowl, beat the whole egg, egg white, and vanilla together. Pour the egg mixture into the dry ingredients and mix them together well. Then add the crystallized ginger and almonds and mix some more.

This was the first time I’ve had a chance to use the mixer my grandmother got us for our wedding and I was very happy to have it! Don’t expect the biscotti dough to be very wet or to mix well. When it’s all mixed together nicely, you should have a substance that looks a bit like very lumpy oatmeal.

Ginger Almond Biscotti - Haus of Ariella

Now you get to form the loaf. If you’d like, you can use a buttered loaf pan. However, I prefer to free form my biscotti loaves on a baking sheet. Free-forming the loaves give you more freedom to shape them, plus I prefer the look. Grease your baking sheet or cover it with non-stick aluminum foil.

Wetting your hands prior to picking up the dough makes it easier to shape (plus it’s easier to get off your hands afterward). I made mine into one large log for longer biscotti, but if you want to do mini biscotti make two logs that are half as wide as the one. Keep in mind that while the dough will spread somewhat while baking, it won’t rise, so don’t make it too thin.

Ginger Almond Biscotti - Haus of Ariella

Bake at 300°F for about 45 minutes or until it’s a nice golden color.

recipe 2

Take out the loaf and let it cool for 30-45 minutes. Epicurious says to cut it after 10 minutes, but I think that’s a very good way to end up with a lot of biscotti crumbles and very few intact biscotti. In my experience, cool biscotti loaves cut much better than warm ones. Letting it cool completely won’t hurt it and it may save you some frustration, so put it on a cooling rack or in some nice, cat-free area and forget about it for a while.

Now that your biscotti is nice and cool (you did wait, didn’t you?), take a serrated knife and cut the loaf crosswise (across the thinner part). I usually cut mine into 1/2″ thick slices, but you can vary that to taste. Put your slices back onto the cookie sheet (you might need to break out another baking sheet to fit them all, or you can do them in shifts) and put them back into the oven at 300°F for about 15 minutes until they get crisp. They’ll get a bit crispier once you take them out and cool them, so if they’re looking darker after 15 minutes, but haven’t reached the level of crisp you’d like, let them cool then check them.

You should have some delicious ginger almond biscotti! Put them in a tin (after eating a few yourself) and impress your friends and family for the holidays!

Ginger Almond Biscotti - Haus of Ariella

Merry Christmas and Happy New Year!

(P)interesting Passover Recipes

Passover started last night, so today was the first full day, and I’m already sick of matzah. For those of you who don’t know, Passover is the Jewish holiday that celebrates when we left Egypt. According to the Torah, the Jews left in such a hurry that they didn’t have time to let the bread rise. Today, we remember this event by not eating any leavened bread for eight days. Sounds pretty easy, right? Only it’s not just leavened bread. You see, the ancient rabbis got a little paranoid about certain things, like flour possibly rising if left in water for over 18 minutes without being baked. So now, pretty much anything with flour in it is a no-go for passover. The exception of course is matzah (or matzo if you prefer).

Manischewitz not only has sickeningly sweet wine, they also make some of the finest cardboard-like products as well as

Yes, these dry, tasteless cracker boards will be the bane of every semi-religious Jew’s existence for the next seven days. Matzah is okay because it was carefully supervised and they made sure that they got that matzah in the oven before the magic 18 minutes had elapsed.

I generally subsist on matzah, cottage cheese, and, of course, matzah ball soup for Passover, but this year I think it’s time to make some changes. Today I got on Pinterest and found some yummy looking recipes to make Passover a little less bland. I’m going to give you direct links to the recipes, because nothing sucks more than finding something really awesome on Pinterest but not being able to find the original source. Well, maybe eating matzah for eight days straight sucks more.

Vegetable Matzo Pie

I definitely want to try this vegetable matzo pie from The Shiksa in the Kitchen. I love artichoke hearts and asparagus, and this recipe has them both in abundance. The recipe is a little more involved than I’d like, but then again, I’m a huge fan of throwing a frozen meal in the microwave and hitting start. The recipe seems to make a lot though, so we can probably just eat on the leftovers for lunch for a few days afterward.

Matza Pizza with Eggs

For a much simpler meal, Martha Stewart provided the recipe for this matzah pizza with fried eggs on top. You probably don’t really need the recipe for this one, but I like the addition of the egg to the matzah pizza. It makes it a little more interesting and you could easily eat this instead of the ever-present matzah brie for breakfast.

Smoked Salmon Hash with Lemon-Parsley Vinaigrette

For a breakfast option that even those of you who aren’t forced to eat matzah will enjoy, try this smoked salmon hash with lemon-parsley vinaigrette from chow.com. It looks delicious, but it will probably be more effort than I’m up for early in the morning (and certainly more than my fiance will want to do that early), so I think we’re going to make this as a side one evening and eat the leftovers in the morning.

Braised Brisket

Our friend Martha also brings us this recipe for braised brisket, which is a bit more involved than the matzah pizza. It still seems quite easy, though it has to cook for about 3 hours. Unlike some of the other brisket recipes I found, this one calls for about 3.5 lbs of beef instead of 8-10 lbs of it, so it’s probably not a bad recipe for two people. We may have leftovers, but I’m a huge fan of leftovers.

Walnut Cake with Chocolate Whipped Cream

For dessert you can go with the macaroons or you can make this delicious-looking walnut cake with chocolate whipped cream from none other than Etsy. The ingredients are simple and it doesn’t call for any flour substitute, so you don’t have to go out and buy matzah meal or potato flour.

Do you have any favorite Passover recipes?